How to Knit
Lesson Seven: How to Work the Knit Stitch
Knit Stitch
After casting on, you’re ready to begin working. The design will either ask you to knit (abbreviated k) or purl (abbreviated p) into the loops you made in your cast-on row. Since you are just learning, you should practice the knit stitch until you are very comfortable with it before moving on to the purl stitch.
If you’re making the Building Blocks Cowl & Hood alongside this tutorial, you’ll get plenty of practice knitting before moving on to purling. The pattern also includes a variation that allows you to work the knit stitch even longer if you need the extra practice.
Choose whether you want to try the Continental or American style of holding your yarn, then get to work learning the knit stitch. Remember, the style of knitting you’ll be doing is determined by which hand you want to hold your yarn in.
Continental (or European) style holds the working yarn in the non-dominant hand.
American (or English) style holds the yarn in the dominant hand.
How to do it:
Basic Principle:
With the working yarn in back, you will be using two needles to create a series of loops, which are the foundation for the stretchy properties of knit fabric.
Rules of Formation
Whether you’re working in Continental or American style, the knit stitch has the same rules of formation:
Working yarn (the yarn you’re making new stitches with) goes behind the needles
Working needle (in your dominant hand) is inserted into first stitch on non-working needle from back end to tip end, front to back
Working yarn goes between the needles from the back end of the non-working needle to the tip end, bottom to top
Finished stitch should have the leg of the stitch that’s closest to your dominant hand in front of the working needle

This swatch has most of the stitches with the right leg in front (for a right-handed person), but the last six stitches on the needle were created wrong, so the left leg is in front. (But if you’re left-handed, that’s what you want to see.)
Continental Knit Stitch
Jump to American-Style Tutorial
In Continental (or European) style, the working yarn is held in your non-dominant hand. Holding it in such a way as to achieve correct tension is key. Please see Holding the Yarn.

Step One:
The working yarn* should be coming from the working needle (the one in your dominant hand you are working onto) unless you are about to work the first stitch in the row. The yarn should be behind the needles. Keep it taut.
*Working yarn means the yarn you are creating new stitches with, as opposed to the tail end at the beginning of your cast on row. If you have wrapped your hand properly for Continental-style knitting, it will be going from your working needle to your wrapped hand behind the non-working needle.
Step Two:
Insert your working needle through the first stitch on the stitch-holding needle from front to back and from the inside toward the outside, where “inside” means the side closest to your non-dominant hand and “outside” means the side closest to the tip of the needle. (Righties: From left to right; Lefties: From right to left.)
This is easiest if you have your non-working needle pointed almost directly away from your body.
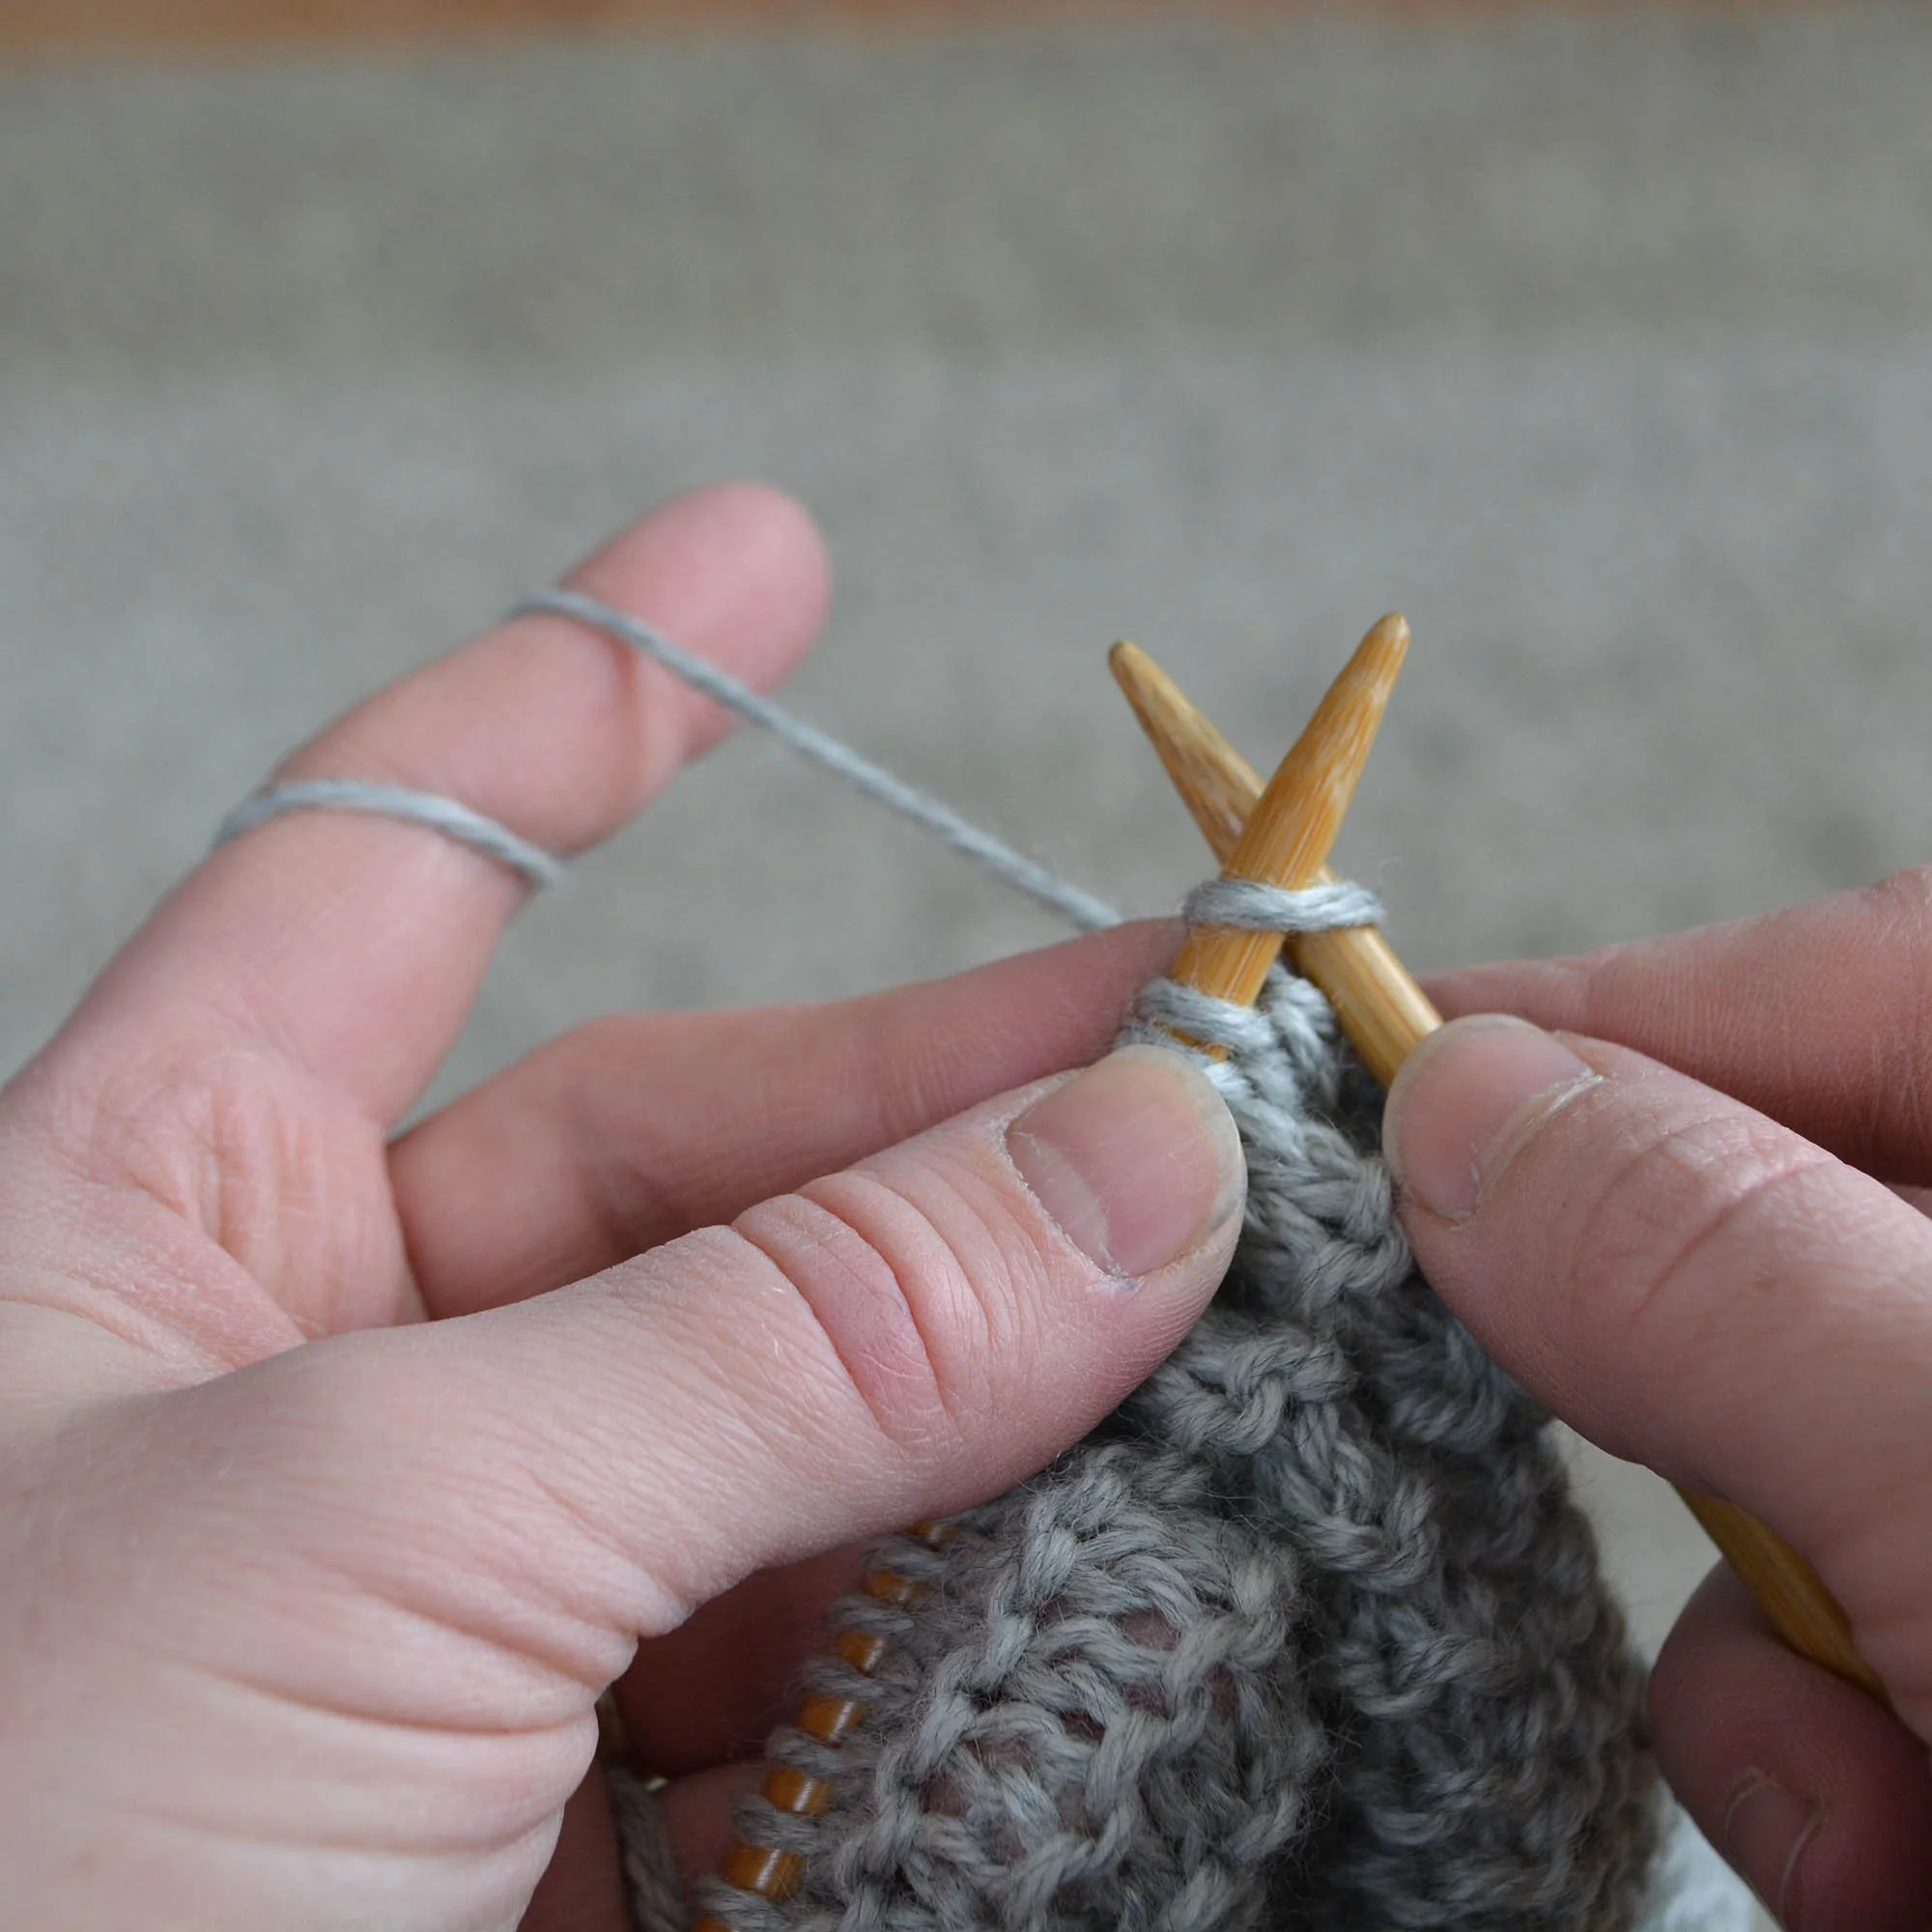
Step Three:
Needles should be crossed through the first stitch like an X with the working needle under the non-working needle. (In other words, the non-working needle is closest to your body and the working needle is behind it, or farthest away.)
The working yarn is still behind the needles.

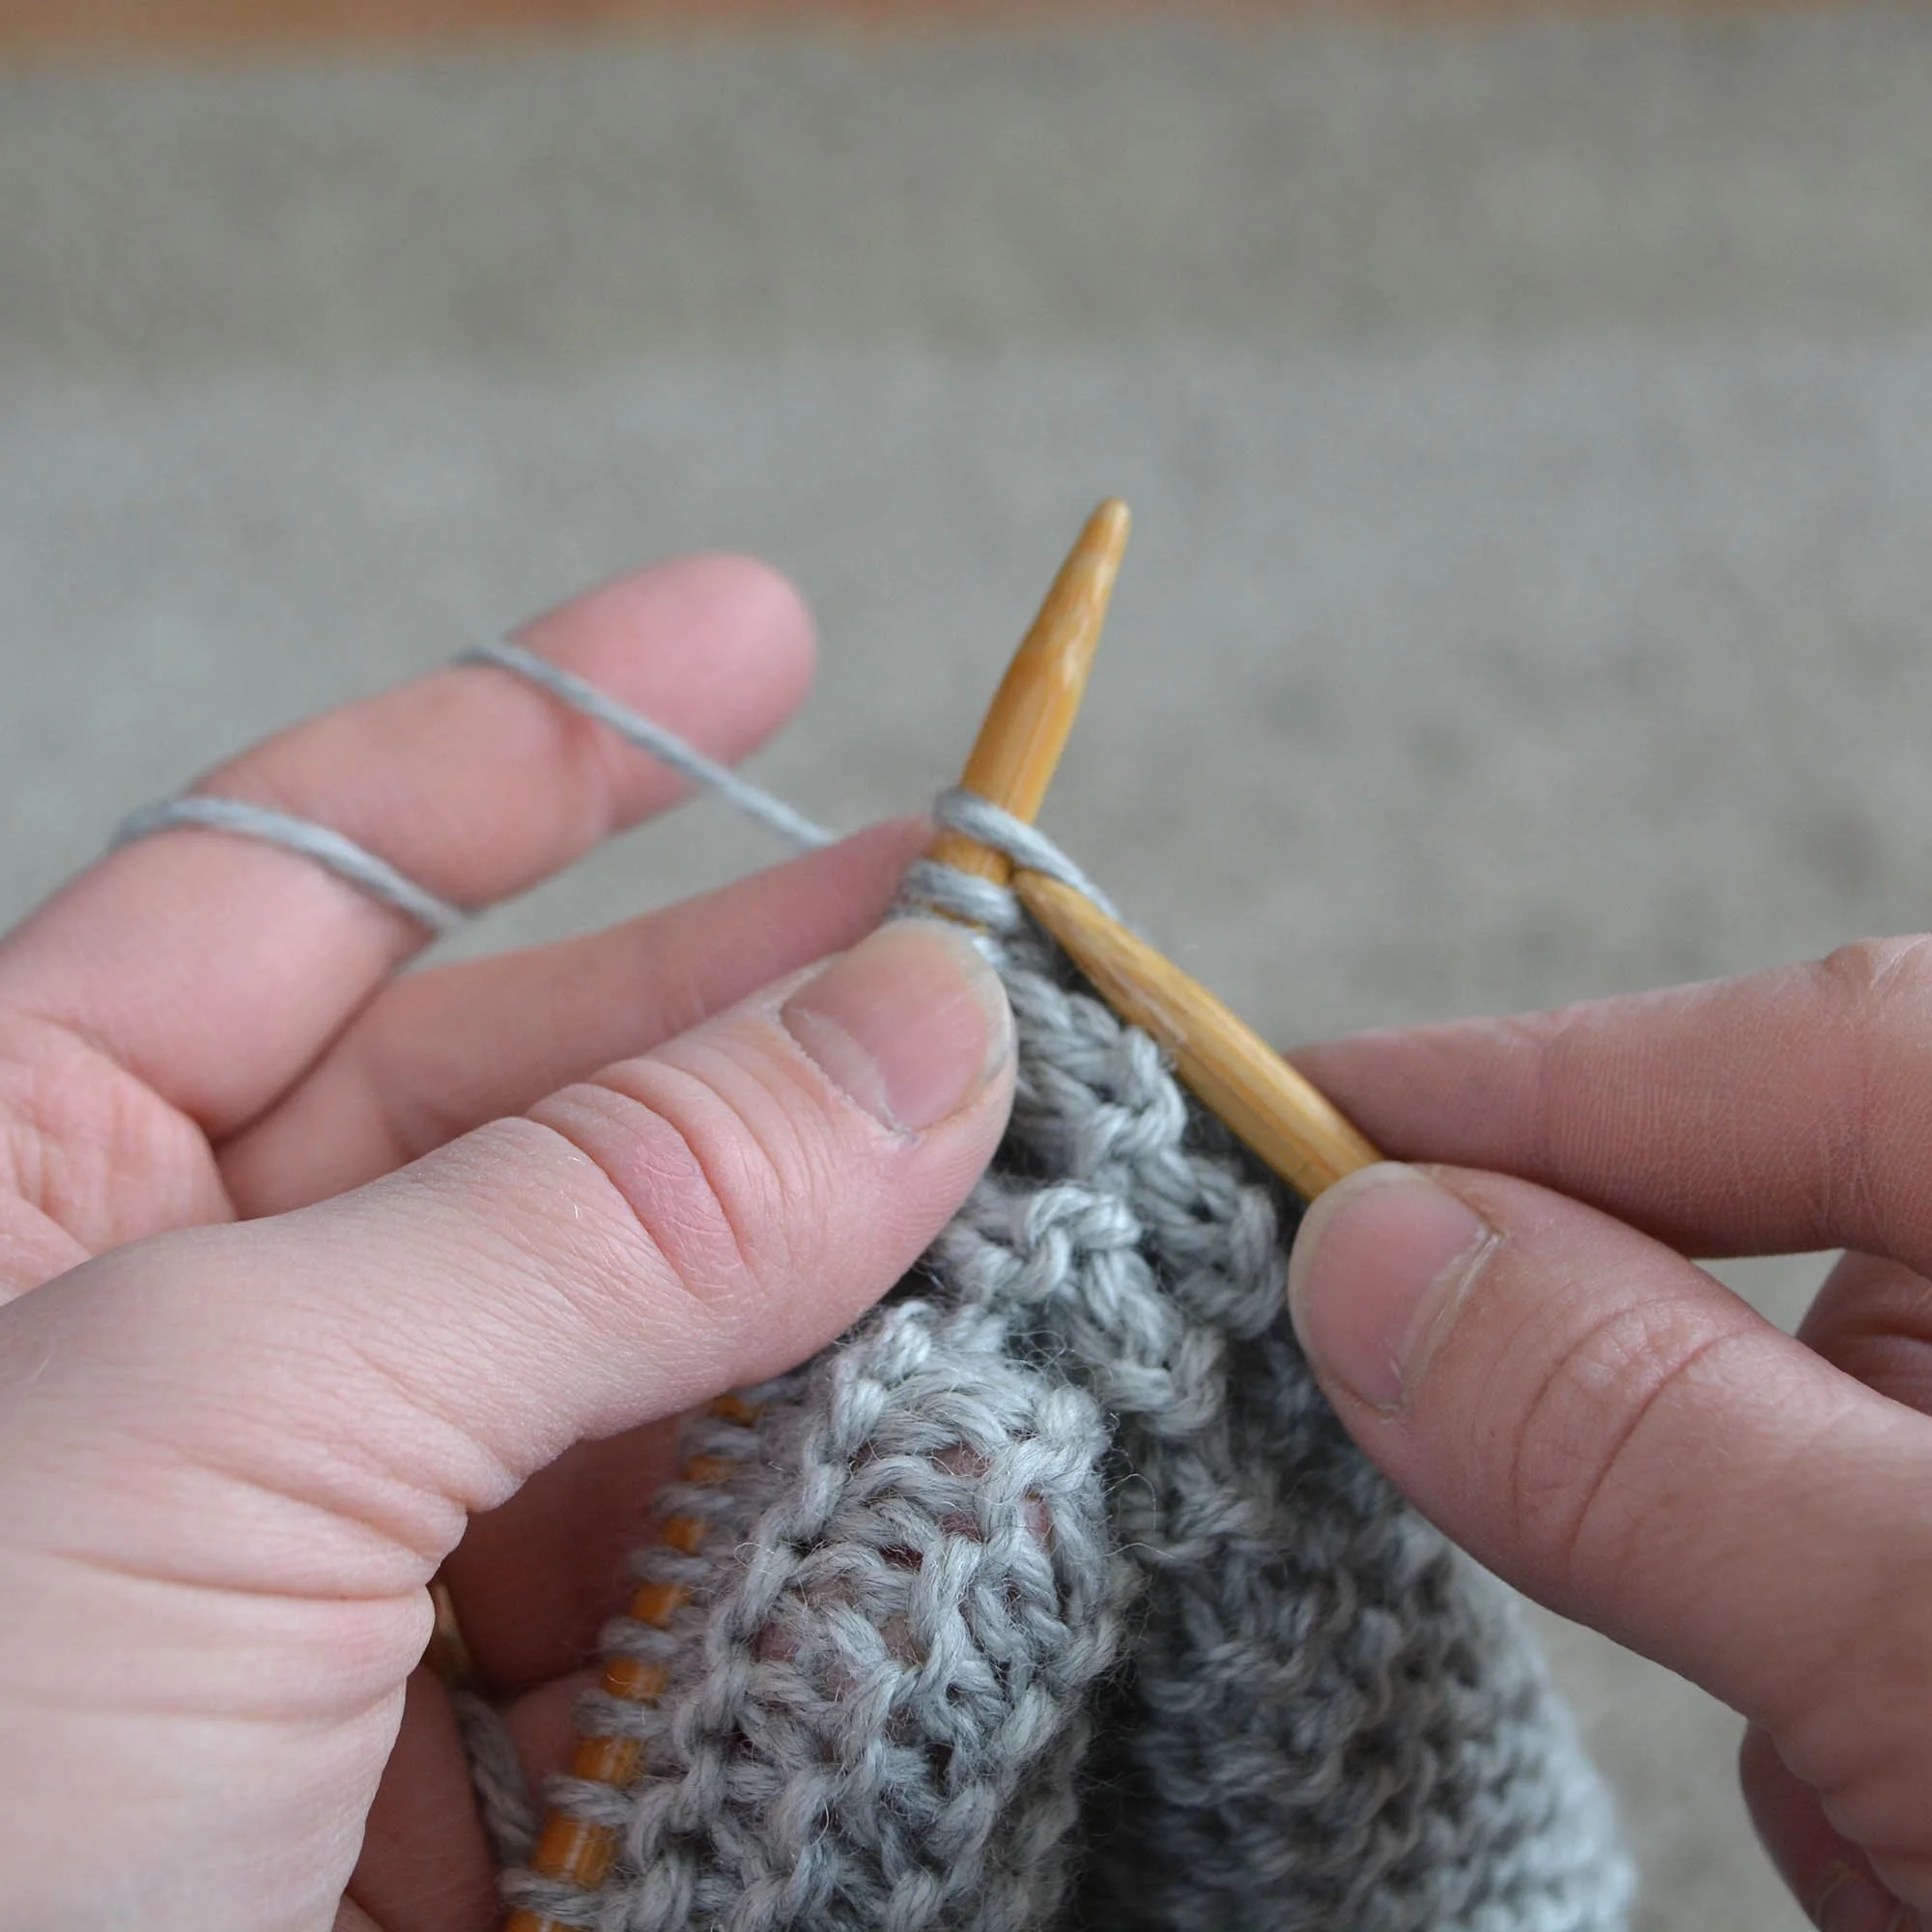
Step Four:
Keeping yarn taut, use your non-dominant forefinger to move the yarn between the two crossed needles from the wrist side outward. Pull yarn down between the needles, and keep yarn taut.

Step Five:
Keeping needles at right angles and keeping working yarn taut, drag the tip of the working needle across the bottom of the other needle to bring the working yarn back through the loop toward the front, creating a new loop on the working needle.

Step Six:
You should now have a new loop of yarn on the working needle that is coming from the original loop you dragged it through on the other needle.
Keep the working yarn taut, but don’t tighten the stitch too much at this point. You can tighten it a little more on the next step, if necessary.
New knitters tend to make their stitches too tight rather than too loose, which will make it very difficult to work into on the next row. The more practice you get, the better your tension will be.

Step Seven:
To complete the stitch, pull the old stitch off of the non-working needle. Use your thumb and middle finger on the non-dominant hand to hold the other stitches in place so they don’t follow their leader off the end. :-)
American Knit Stitch
Jump to Continental-Style Tutorial
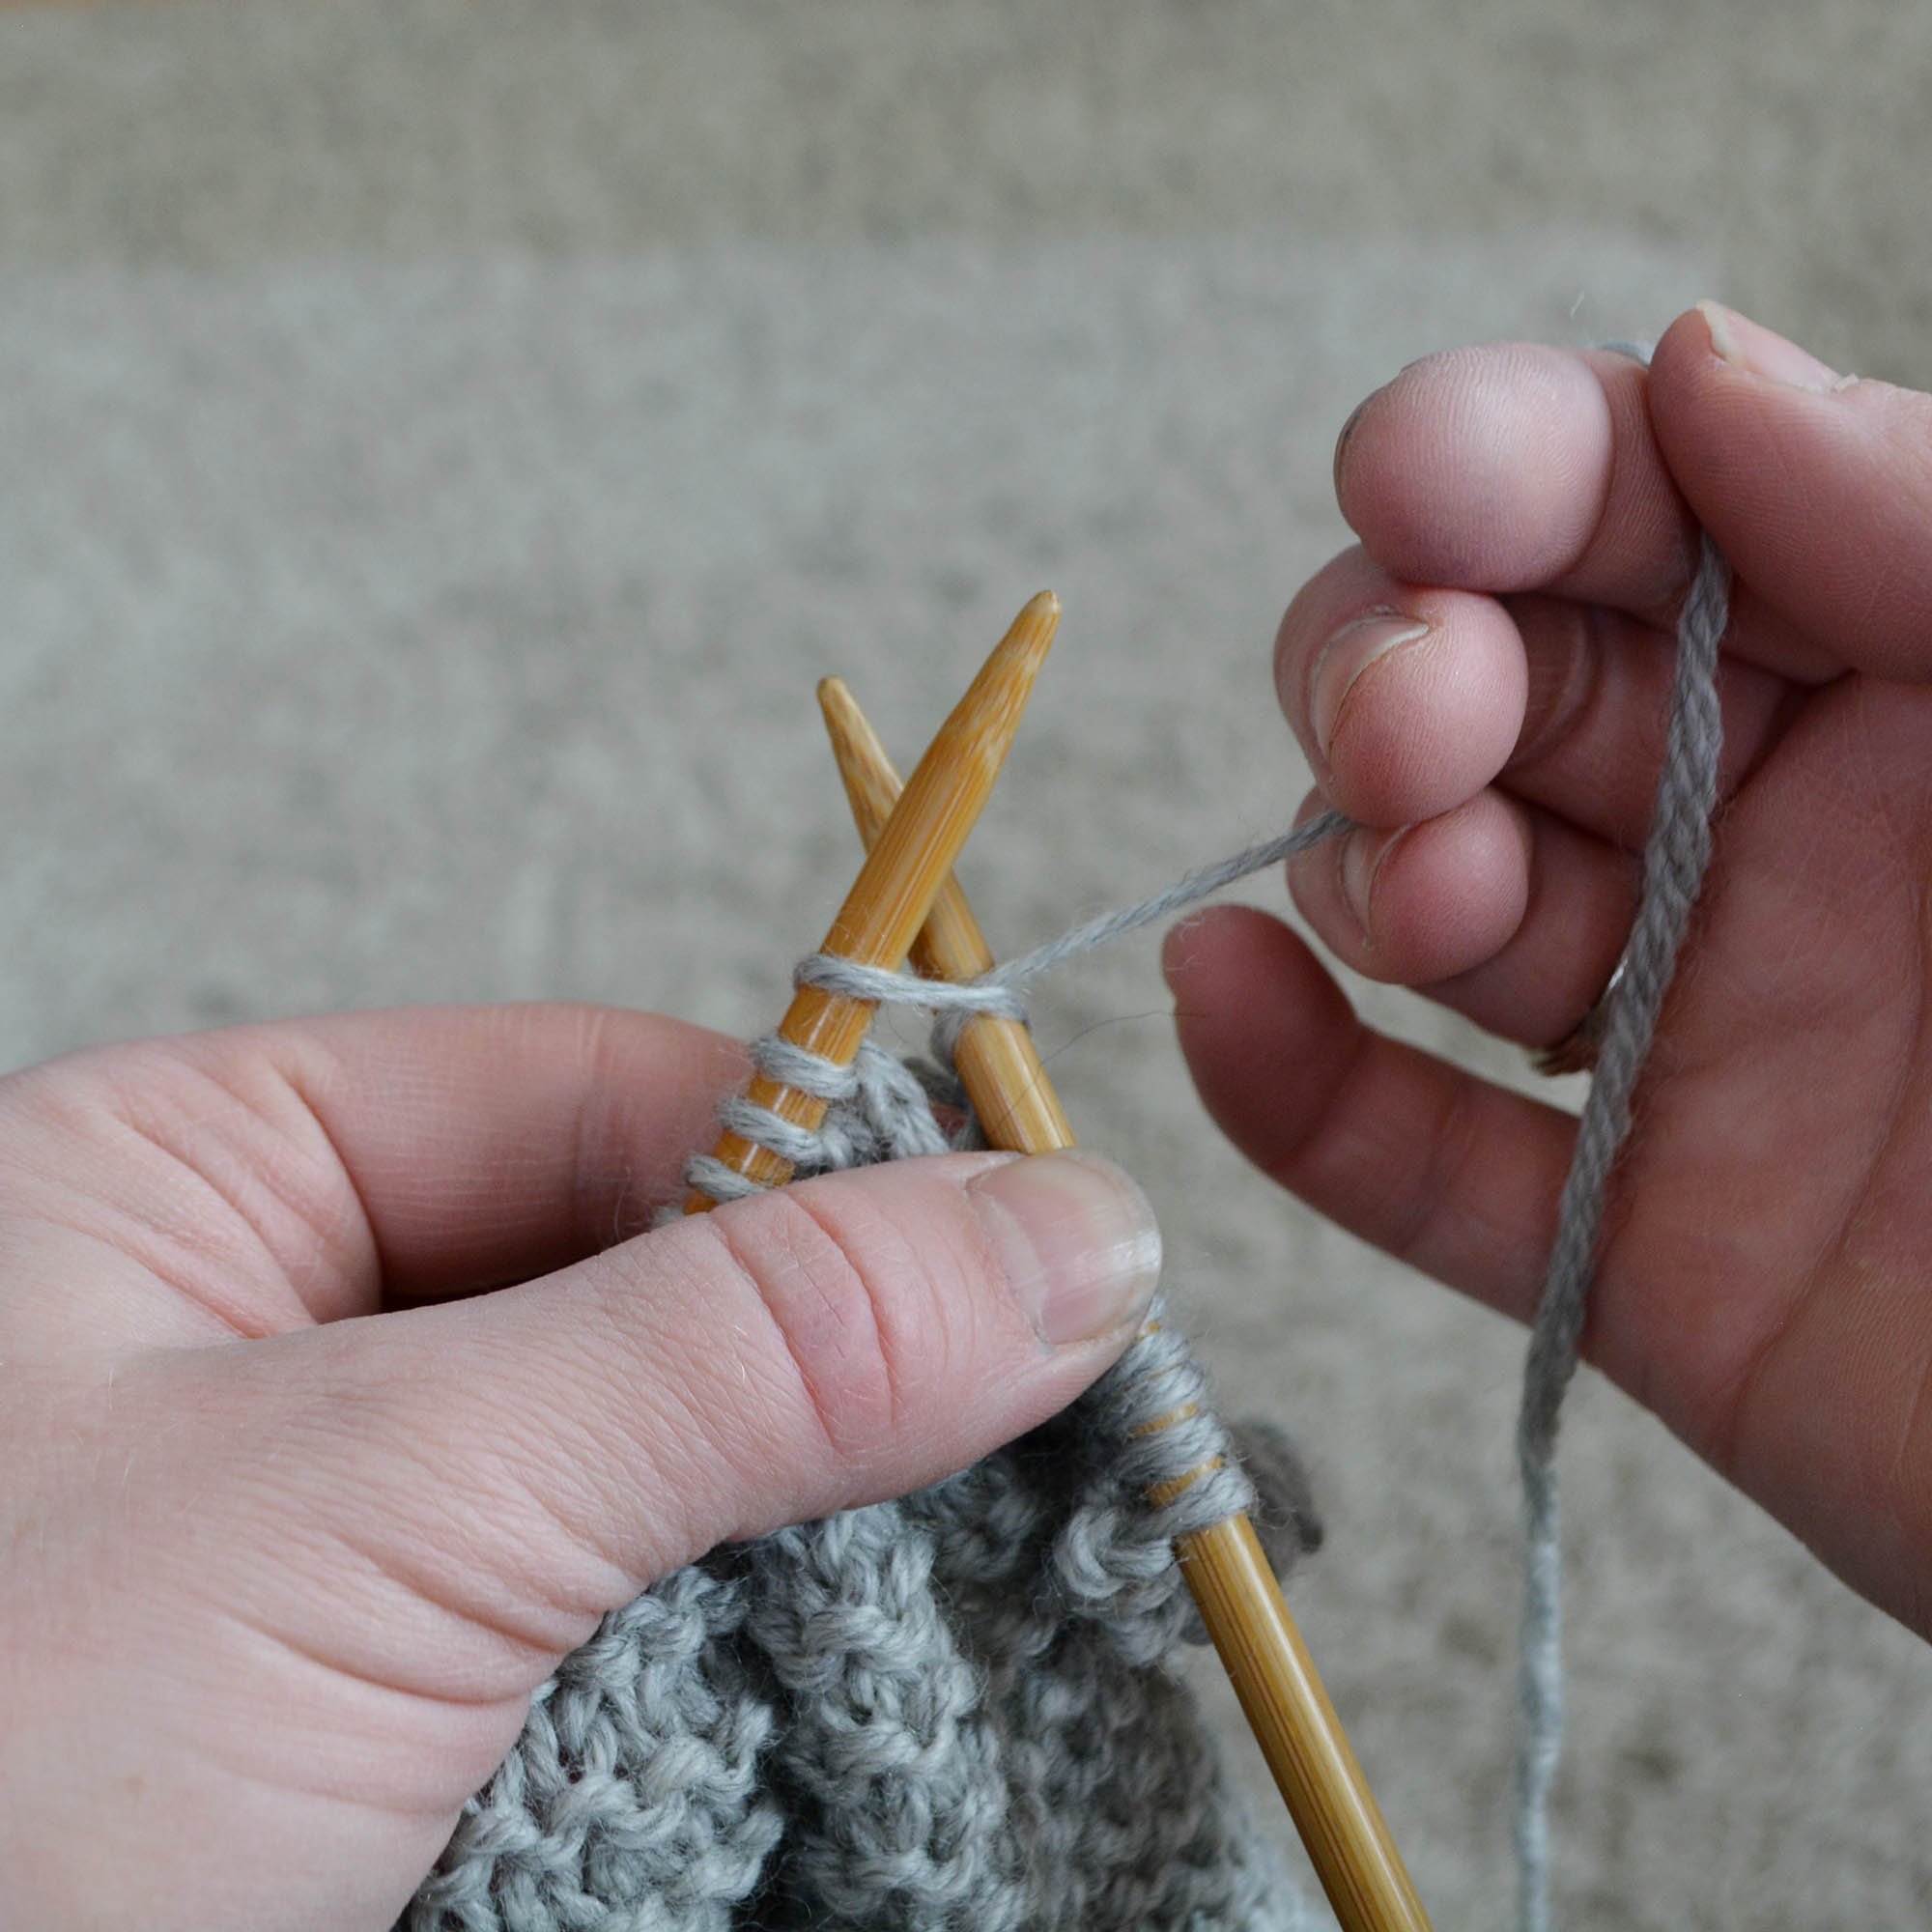
In American (or English) style, the working yarn is held in the dominant hand. To create proper tension, pull on the yarn after wrapping. Please see Holding the Yarn.

Step One:
Wrap the yarn around your fingers on the dominant hand in such a way that you will be able to hold the needle and keep yarn taut. This likely means weaving the yarn between your index and middle fingers. Yarn should be behind needles.

Step Two:
Insert your working needle through the first stitch on the non-working needle from front to back and from the inside toward the outside, where “inside” means the side closest to your non-dominant hand and and “outside” means the side closest to the tip of the needle. (Righties: From left to right; Lefties: From right to left.)
This is easiest if you have your non-working needle pointed almost directly away from your body.
Keep working yarn behind the working needle in your hand.

Step Three:
Needles should be crossed through the first stitch like an X with the working needle under the non-working needle. (In other words, the non-working needle is closest to your body and the working needle is behind it, or farthest away.)
The working yarn is still behind the needles.

Step Four:
Wrap yarn around behind the working needle, then move the yarn between the two crossed needles from the non-dominant wrist side outward. Pull yarn down between the needles. Make sure the yarn passes between the two needles from the side closest to your hand on the non-working needle outward.
Step Five:
Use your dominant hand to keep yarn tight so that it will be easy to pull it back through the stitch.

Step Six:
Keeping needles at right angles and keeping working yarn taut, drag the tip of the working needle across the bottom of the other needle to bring the working yarn back through the loop toward the front, creating a new loop on the working needle.

Step Seven:
Use the working needle to pull the old stitch off the other needle, keeping forefinger on the non-dominant hand on the remaining stitches to prevent them falling off too.
Application Point
You can either keep hanging tight until we bring all this together in Lesson Nine, or you can try a few practice stitches now. If you want to practice now, cast on 31 stitches using Knit Cast On. Then work the knit stitch back and forth until you are very comfortable and your stitches start to look even. Be sure to count every row to make sure you haven’t accidentally added or lost any stitches.
Then move on to the next lesson.